Friday, June 17, 2011

Budget Buys - Long Lasting/Long-Wearing and Waterproof Products Review

Before I begin, I'd like to apologize for my absence. The past month and a half have been a little bit crazy but I'm slowly getting back into the swing of things. It's taken me longer to write this blog post than I would have liked, but not thinking about writing a post a few times a week made it harder to come up with inspirations for it.

Anyways, I'm back on track now! As you may be aware, I am planning on doing hair and makeup for one of my good friend's wedding. I have done stage makeup before, but this is a lot more intimidating to take one. As such, I have been preparing myself by practicing how I want her makeup to look and making sure I have all the right tools for the job. One of the biggest issues? Make sure everything lasts for hours! And, of course, make sure it doesn't smudge when she cries.  Because she will probably cry at least a little bit. If not, there will be plenty of sweat and tears coming from the loved ones around her on her special night. This leads to...


Waterproof Makeup:

  • Waterproof mascaras are super easy to find. The formulas are different from regular mascaras so they'll hold a curl better if you like to curl your eyelashes regularly. L'Oreal Voluminous Mascara or Cover Girl Lash Blast are both great options and they usually sell for around $7.00. As you should change your mascara every 3 months, spending $20 a tube can be a bit much if you're trying to be budget conscious.
  • A good waterproof eyeliner is a bit more difficult to find, not just because it's not as common, but because they don't all hold up well when water is involved. Makeup Forever has the new Aqua Liners that are swim-proof, but they cost $23 a tube. Yikes! On the other hand, Wet 'n Wild has a waterproof eyeliner for only $3.99. There is a downfall to it, and that is the fact that it comes with the worst brush ever. If you're going to be using the eyeliner, you should probably plan to use a different brush as the one that comes with it is a super stiff felt tip... thing. I did a swatch on my hand and it took about a day before it started rubbing off. Milani has a waterproof eyeliner that is still quite visible on my hand after doing a swatch Wednesday night. It retails for about $5.50, and Milani products can be purchased either online through their website or at either Target, Walmart or a chain pharmacy. Pro tip: don't apply waterproof eyeliner on an oily lid as it will make it smudge easily. Apply some powder to dry up the skin or use it on top of your eyeshadow. Wait until it has dried completely (it can take up to a minute) before you start batting your eyelashes like a maniac. 
  • Setting sprays can most definitely help keep your makeup looking wonderful for hours. Urban Decay has one called All Nighter that works pretty well, but the cheapest you'll find it is for $11 in a tiny travel size. Instead of buying an expensive one, you can use the setting spray from e.l.f that is only $3 with the one downside being the initial smell of it can be a bit off-putting. Once the smell of it has faded, your makeup should be good and ready for hours! Pro tip: If you don't suffer from sensitive skin that liked to break out all the time, you could just simply use regular hairspray to set your makeup.

Long Lasting and Long-Wearing Makeup:
  • It's all in the lips (well, hips, but I like my version better). A great way to ensure you have beautiful lips for hours is by using a lipstain. Lipstains keep color on your lips for hours without needing to touch them up. Revlon's Just Bitten lipstains, for $6, also come with a lipbalm on the other end so you can keep the dryness away all day. Another tip for lips is to wear a lipliner that covers your lips fully and apply your lipstick over it. This will keep the lipstick from sliding off and can also help you get the perfect colored lips as well. (Ugh. Could I have used the word "lips" more in that last paragraph? Challenge not accepted) 
  • Lipgloss doesn't usually last very long. Especially if it has a yummy taste as (I'm guessing more people than just me do this) you'll spend the entire time you're wearing slowly licking the gloss off. Along comes Essence's Stay With Me lip glosses which, for just about $2, actually have very decent durability. The pigmentation is also wonderful, as it covers almost as well as a lipstick. 
  • Eyeshadows look great. Until they crease. And then they don't look so great. What can you do to avoid losing your eyeshadow right after applying it? Use a primer! e.l.f. has a great dupe for the Urban Decay Primer Potion and it's only $1. Yes, just $1. It works just as well at keeping the eyeshadow in place, but also in how it allows for the color to be blended on your lid. Some eye primers seem to show color better while not blending color well while others don't show off the color but allow for easy blending. With the e.l.f. primer you get both! 
  • Face primers will help keep your makeup in place, even in the summer heat. The good news is that you don't have to spend over $30 getting a quality primer from Shamshbox when you can just go to your pharmacy and buy yourself some Monistat chafing relief gel for $8. Apply a small amount after your moisturize and before you apply your foundation and your makeup will look gorgeous by helping to minimize the apparence of pores while improving the texture of your skin.
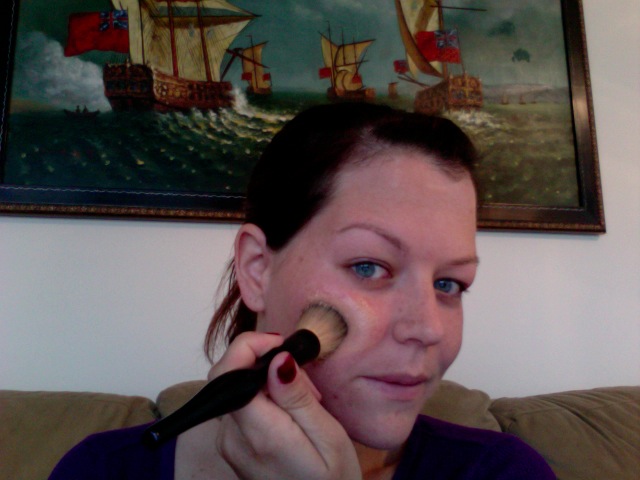
  • Powders are typically used to help seal the makeup in place so it stays in place. If you need help controlling oily skin, a great option is to go for mattifying powders. For light coverage but great oil control, Rimmel's Stay Matte powder is a great buy for $4. If you want more coverage out of your powder, Milani's Multitasker Face Powder works wonders for around $6.  
  • Foundations come in many forms. Some have SPF, some work well in matching your skin tone. Some have very sheer coverage while some will block every freckle you have. While coverage can be very buildable with most foundations, durability doesn't correlate with quantity of makeup used. The good news is that, while you generally have to try the foundation out (or read a bunch of reviews before your purchase) to figure out the level of coverage, you can very easily tell when the foundation is meant to last all day as it will be labeled as such. A great long wear foundation is Rimmel's lasting finish 25 hour foundation, which retails for about $6. Not only does it last for a really long time on your skin, but it has a really nice level of coverage without looking cakey in the slightest. The downside of this foundation is the lack of shades available to choose from, and the difficulty in finding the right shade to match your skintone (the colors look super dark in the tubes and there's only 11 shades to choose from)
Pro tips on long lasting makeup: if you use a cream product as a base, you can apply a powder on top to seal it into place. This isn't just for foundations and for eyeshadows, you can use this with blushes, eyeliners and lipsticks too! If you use a cream blush, set it in place with a powdered blush. Black eyeliner on your waterline tends to run easily, but not so if you apply some black eyeshadow over it. If you use a creamy lipstick, dust some loose powder on your lips through a tissue paper. Giving your makeup something to adhere to on your face will mean it's less likely it'll search elsewhere for it. Pro tip for life: get a pet. And don't listen to radio stations that censor the word "pants".

Monday, May 2, 2011

Changing Seasons - Changing Makeup

As the weather gets increasingly warmer, many things start to change. Flowers bloom, the trees get full of leaves again, and your skin looks like you missed your mouth when attempting to put on lip gloss. Not everyone's skin goes through huge changes with the seasons, but it is important to pay attention to your skin care and makeup routine if your skin does.

What Are The Best Ways To Adjust Your Makeup To The Changing Seasons?

  • Moisturizers: one of the easiest ways to help your skin adjust is by changing what moisturizer you use. If your skin is no longer dry all over, using heavy lotions can make your skin look greasy while increasing pore blockage. If you're going to be spending time outdoors, do remember to use something with SPF or use sunblock underneath your makeup to protect your skin
  • Foundations: As with the moisturizers, it's good to change your foundation to something lighter to help your skin breath. It's important to keep your skin type in mind when getting foundations so you're not emphasizing the oiliness or dryness of your skin. If you suffer from oily skin, go for products that are mattifying and avoid products with silicon and/or glycerin as their main ingredients as they will just make your skin look sweaty and oily. If your skin tends to be more on the dry side, you can go for products that aim to give you a dewy look and have hydrating elements to them. 
  • Tinted Moisturizers: If you want very light coverage for your skin, a tinted moisturizer can be the way to go. It is usually harder to cover up spots and skin irregularities with tinted moisturizers, so keep that in mind if you want to go with tinted moisturizers over foundations.
  • Powders: If your skin is still dry during spring and summer, be careful of what powders you choose to wear as a lot of them are geared for making your skin look matte and your makeup staying in place. Look for powders that are labeled as "hydrating" and apply sparingly. If you suffer from oily skin, a powder can really help your skin look under control. There are many that aren't just oil-free but also oil-absorbing and helps your skin look clean and fresh all day.
  • Colors: With the changing of the seasons you can really change things up color-wise. Even though I'm not a fan of "makeup trends" I do love the emphasize on some colors. This season it's all about corals, which can look wonderful on everyone as long as you find the right shade and tone for you. As corals tend to be on the warmer side, finding a pink hued coral can help make it more flattering for people with cooler skin tones. 
Tip of the day: As the warm weather can make your makeup run more easily, go for long lasting foundation so it doesn't melt off. Or just stay inside with the A/C on!

Thursday, April 28, 2011

e.l.f. Products Review and FOTD!

Buying makeup can be a bit straining. The brands you really trust to deliver can be very expensive, and the cheap brands can be just as cheap in quality. This is why I have been pleasantly surprised (for the most part) with the quality of the e.l.f. products I have acquired in the past few weeks. 


It all started with a trip to target. After casually browsing the makeup section, I notice a brand that has all items for either $1 or $3. All I could think of was "uuhhhhhhhh, these things are probably terrible." After going to target a few more times (and starting to hear about them online) I decided to finally give them a try. I started with a contour eyeshadow brush, which I immediately fell in love with it. I the got the shimmering facial whip, the brow kit, the tinted moisturizer and the contouring brush & bronzing powder set, a lipstick and the BeautyBook: Bright Eye edition, I decided that I hadn't tried enough items to really gauge how much I liked them as a makeup company. I decided I had to buy more stuff.


I took advantage of one of their online sales and, after much deliberation, decided to do some shopping! From the website and Target combined I got the following items:

  1. Nail polish in Metal Madness 
  2. Blending eye brush
  3. Stipple brush
  4. Contour eye brush
  5. Blush brush
  6. Eyeliner brush
  7. Eyeshadow brush
  8. Custom palette compact
  9. Custom eyeshadow in Ivory
  10. Custom eyeshadow in Moondust
  11. Custom eyeshadow in Mocha
  12. Custom eyeshadow in Dusk
  13. Eyelid primer
  14. Liquid eyeshadow in Cream Dream
  15. Liquid eyeshadow in Posh Pewter
  16. Lipstain in First Date
  17. Lipstain in Fashionista
  18. Lipstick in Gypsy
  19. Pigment eyeshadow in Innocent Ivory
  20. Pigment eyeshadow in Golden Goddess
  21. Lip definer & shaper in Nude
  22. Cream eyeliner in Black
  23. Mineral Infused Face Primer
  24. Tinted Moisturizer in Porcelain
  25. BeautyBook: Bright Eye Edition
  26. Contouring Blush & Bronzing Powder
  27. Shimmering Facial Whip in Spotlight
  28. Dramatic Lash Kit
  29. Eyebrow Kit in Light
  30. Eyeliner pen in Black
The Really Good:

My most favorite purchase is the cream eyeliner. It is super creamy and glides on really well, so it doesn't drag your eyelid as you're trying to apply it. The custom eye palette is wonderful as the shades have great color payoff and it's small enough to fit in my purse. The eyelid primer so far has been very comparable to the Urban Decay Primer Potion while costing significantly less than the $18 price tag the UD one has. I wore it outside with the wind making my eyes watery and my makeup didn't smudge at all.

The Good:

The eyeshadow pigments have been great in color and pigmentation, I have just never been the biggest fan of loose powders ( I will end up making a huge mess every single time). The shimmering facial whip is a great highlighter for the cheeks, and can be used to add a bit of light to your skin if you're not planning on contouring your face. Eyeshadow palettes that cost $5 are usually something to be weary of, but I've found good color payoff and variety of colors to play with in the BeautyBook. Contouring is made easy and shimmery with the blush & bronzing powder kit; the colors are lovely and it's not shimmery enough to make you look sweaty. The face primer has a velvety soft feel to it, and it seems to even out the skin texture fairly well. Another plus side to it is that it is colorless, so you don't have to worry about it matching to your skin. The lip definer & shaper is very creamy, making application very easy. It also has the benefit of not being overpowering with color, so the definer gives you a good base to apply colored lipstick over while the shaper helps outline the shape of your lips by creating a gentle contrast.

The "Doesn't Stand Out As Bad Or Good So Get It If You Want Something Cheap":

Tinted moisturizers don't provide a lot of coverage, so this one from e.l.f. seemed to keep my skin looking moisturized while I was wearing it but I could never tell how well the "tinted" part of it was doing. Maybe it was ninja good, and I just never noticed it. In any case, I have no complaints about it, and my skin was never irritated due to wearing it. The nail polish has been as durable as other brands I have used, I just don't like the texture as it looks rough. I don't know if it's the same texture for all the different polishes, but I don't see myself using it very often. The eyebrow kit isn't bad, I personally prefer using eyebrow pencils over wax to fill in my eyebrows as my skin seems to take on the color better. If I use anything that requires a brush, no matter how much I fight it, I always end up with a line of no color in my brows that won't be filled. 

The Bad:

The one lipstick I tried was in the shade Gypsy. I love the color and I love the smell of the lipstick. I would love it even more if it wasn't such a hassle applying it to my lips. It's super think, so trying to apply it directly to your lips is a bit of a struggle. The lipstains also had very lovely colors, but had absolutely no staying power. I don't think they work the same way as other brands of lipstains do, since once they were dry there was still color rubbing off on the lipgloss wand. The eyeliner pen I really liked originally, but the more I use it the harder it is to use. The tip is so stiff, that it has slowly changed the shape of it to where I can only comfortably use it on one eye. On the other eye I'm lucky when I don't smudge it all over my lid when I try to wing out my eyeliner as it pulls so much on my skin. I guess if you never do any wings and just stick to eyeliner on your lashline it is a good, cheap alternative to the more expensive brands.

The "I Would Throw Out If It Weren't For The Fact That I Am Waiting To Burn Them In A Fire":

Although it may sound like I'm being a bit over-dramatic (which I never am), I'm not exaggerating my distaste for the following items. The liquid eyeshadows looked wonderful when I did swatches on the back of my hand, which is why it was so infuriating when I tried them on my lid and they pretty much disappeared. I tried them also with primer and eyeshadow base and nothing could keep them from being terrible. At least there was product in the package because when I attempted to try the fake eyelashes I got a little puff of air where the glue should have been. Let me repeat that because I still have a hard time believing it; there was no glue in the glue tube. Not only that, but there was so much glue on the lashes to keep them in the tray that I almost wasn't able to remove them. 

Overall I'm very happy I gave e.l.f. a chance to impress me with their products. For how much they cost, I have been glad to discover several products I'd buy time and time again. There are now a few items I'm really looking forward to trying out such as the eye transformer and the high definition powder. 

Skincare tip of the day: sometimes sticking to "oil-free" products can be good but it's good to remember that some products require oil based makeup remover to take them off. Always use an oil-based makeup remover when taking off waterproof makeup and anything else that may be giving you issues. Baby wipes and towelettes will not take all of your makeup off, so don't trust any brand's BS that their towelettes will "erase 99.3% of your most stubborn makeup, even waterproof mascara, in one easy step."

FOTD (Face Of The Day)!

I still hate my computer's camera.
If you'd like to know what products I used for this look, let me know!

Monday, April 25, 2011

Basics on a Budget

When it comes to makeup, everyone has a different idea of what their "must have" items are. For some it is mascara while other people might feel they look like a dead person without some blush. There's isn't a right or wrong when it comes to choosing your basics, it's all a matter of personal preference. But what if you don't wear makeup often? What do you keep around for when you do decide to wear makeup? Well, here's a little rundown of good items to have for a complete look, and where you can get them for cheap.

For The Face:

  • Foundation: Coverage varies with each kind but can range from low to very heavy. Good for evening out skin tone and covering mild imperfections. (I personally love L'oreal True Match Foundation $7-8) 
  • Powder: Good for setting your makeup in place or as a mattifier. A mattifying powder is a good product to have if you suffer from combination to oily skin. (Rimmel London Stay Matte Pressed Powder $5) 
  • Concealer: If you have blemishes, perpetual redness of the skin, or simply under eye circles, a concealer can help adjust the color balance. Redness and blemishes are cancelled out by green based concealers, salmon colored concealers cover up under-eye circles, and a concealer that matches your skin tone can (Hard Candy Nobody's Perfect Concealer Palette $8) 
  • Blush/Bronzer: Add a bit of life to your skin by using a blush or a bronzer. You can even use both and contour your face to give it a more sculpted look (e.l.f. Studio Contouring Blush & Bronzing Powder $3 or Wet N' Wild MegaGlo Illuminating Powder $4) 


For The Eyes:

  • Mascara: You can lengthen, you can add volume. Using mascara can help make your eyes look bigger and brighter. When wearing eyeshadows and eyeliners, it can help give your eyes a "finished" look. (L'Oreal Voluminous Million Lashes Mascara $7) 
  • Eyeliner: Two good eyeliner colors to have are a white eyeliner and a dark-colored eyeliner in either brown or black. Apply white to your waterline to make your eyes bigger and brighter and a dark eyeliner to your upper and lower lash-line help define the shape of your eyes. (Wet n Wild Color Icon Eye Liner Pencil $1)
  • Eyeshadow: From helping bring out your eye color to making your eyes appear to have a different shape, playing with eyeshadow can be a lot of fun. A cheap way to have a lot of colors to play with is to get a palette. Don't know what colors to go for? Purples and browns work well with all eye colors. (If you want a large selection, go for e.l.f. Studio Endless Eyes Pro Mini Eyeshadow Palette in Everyday Basics $5)

For The Lips:
  • Lip color: Having a neutral color that you can build on intensity is the way to go if you don't want to buy a ton of different lipstick shades (Wet n Wild Silk Finish Lipstick $1). You can also build intensity when using lipstains (Revlon Just Bitten Lipstain + Balm $8). For durability, use a lip liner as a base for the lipstick (NYX Slim Lip Pencil $3.50).

What To Buy:

The safest bet is to go for things that enhance what you prefer enhancing. If you want to bring out your eyes, focus more on buying eye makeup. Maybe even play around with different kinds of eyeliner. If you want to look made up without looking like you're wearing makeup, then focus on things to bring color and structure to your face. 

Where To Buy: 

You can go online and order directly from a lot of makeup companies, as you an find great discounts and deals. If you prefer to try in person or the company only sells to distributors, Target is a great place to buy makeup as it sells a large variety of brands for very low prices such as e.l.f. and Wet n Wild. Walmart sells Hard Candy makeup as well as staple brands (Revlon, L'Oreal, Cover Girl, Maybelline). For mid to high end brands, Ulta is a great place to shop for makeup; if you want to try a budget friendly brand that delivers like the high end brands try some makeup from NYX. Last but not least, there's always a local pharmacy such as CVS or Walgreens with beauty section to help meet your makeup needs. 

Tip of the day: You don't have to go for the most expensive makeup to get the best looking results. Extra tip of the day: SPF is your friend, unless it's in the form of titanium dioxide in your foundation and it makes it look like a ghost is coming out of your freakin' face when pictures with flash are taken.

Tuesday, April 19, 2011

Dealing With Color Payoff In Eyeshadows

Ever seen a gorgeous shade of eyeshadow, get super excited about putting it all over your lid, put some color on your brush to apply it and then... nothing. You have barely a hint of what the color should be! UGH!

So what can you do if this happens? You can try a few of the following tricks to bring out the boldest color possible.

  1. Use a primer! This will make the skin tone on your eyelid even and will be a good base for the color to stick to.
  2. Figuring out the best primer is also important. Some will really bring out the color but make it harder to blend while others will make blending super easy but not show the color as brightly. (I personally love the Urban Decay Primer Potion or the Two Faced Shadow Insurance)
  3. Use a base on top of the primer and before putting any eye shadow on. You can use a NYX Jumbo Eyeshadow Pencil or a MAC paint pot or even an eyeliner.
  4. Pat the color on to your lid. You're trying to pack it in as opposed to sweeping it over your lid. This will help it have a stronger color and even less eyeshadow fallout on your cheeks.
  5. There are some eyeshadows that can be used wet. When the eyeshadow goes on wet it can have more vibrance to it. Before you apply any water to it, make sure to check whether it's meant to be used wet, otherwise applying water can ruin the makeup.
  6. Brushes, brushes, brushes! Not all brushes are made the same way and they can make a difference in how vivid the color looks on your lid. To really pack the color on to your lid, I'd suggest getting a good paddle brush (such as the MAC #239 or the Sigma E25). Packing the color on the outer corner of your eye can be done with many a different brush; my favorite is the contour brush from e.l.f. Don't forget to blend out the shadow with a fluffy brush!
Speaking of brushes... how do you know if a brush is good? Density! The denser the brush, the less product is going to be lost between the hairs of the brush. Another thing to pay attention to is the shape. Tapered, soft brushes are going to be good at distributing color and blending it out so don't use them if you're trying to pack the color on to your lid.

Super awesome tip of the day: Don't have time to do full makeup? No worries! Sometimes just adding a bit of color is all you need to look awake. Fill in your eyebrows if yours are light and sparse (highlight the browbone if desired). Add a tinted lipbalm to your lips, a bit of blush or bronzer to your cheeks and maybe even a bit of eyeliner on your upper waterline. This is called tightlining which makes your lashes look a bit fuller without having to apply mascara. BAM! Now you look awesome.

Minimal makeup can still make a huge difference


Monday, April 18, 2011

Making your eyes POP!

An important thing to note, before you stress too much about makeup, is that it's all in how you wear it and how much fun you have with it. Sure, sometimes you want to have it fit the occasion (like at work, wedding or funeral) but, for the rest of the time, try to have as much fun with it as possible! 

When it comes to enhancing eye color, you're only limited by your self. Eyes don't have just a singular color in them so you don't have to stick to one or two colors to "bring out your eyes". Blue eyes, for example, don't have just a solid tone of blue surrounding the pupil; the iris can have many specks of colors in it. If you look closely, you'll see you have many options on how to make your eyes really POP!

The Basics:
  • Complementary colors are colors on the opposite end of the color wheel. The main idea is to highlight the color by choosing the one of the opposite side of the wheel. 
  • Red is directly complemented by green, blue is complemented by orange and yellow is complemented by purple.
  • Because no eye is one solid color, you have a big range of colors to play with that will make your eyes pop in different ways.


For Green Eyes:

  • Skin tone is very important when enhancing green eyes. If you have olive skin avoid silvers and blues. You have more freedom when you have fair skin to use cooler colors, but if you stick to colors that are warmer they won't be as likely to dull the green in your eyes.
  • Red based colors such as browns and purples work wonderful for green eyes (and help you avoid looking like a christmas decoration by using a straight up red.)
  • Use peach toned blushes to compliment the color of your eyes.
For Brown Eyes: 
  • Women with brown eyes are very lucky as they can wear pretty much any color. Skin tone is the most important factor into what can look best for your eyes. 
  • Blues, purples, golds and browns look best and suit almost any skin tone. Want a little extra kick? Try shades in shimmery or metallic versions to bring more light to your eyes.
  • While sporting a natural look, stick to white eyeliner on the waterline to make the eyes look bigger and balance out the color.
For Grey Eyes: 
  • Since grey is a neutral color, you can use a wide variety of colors. 
  • Grey eyes can have blue and green tones, so play with what color you want to bring out:
    • To bring out the blue, use golden colors.
    • To bring out the green, use purples and greens.
  • Avoid using a tone that matches your eye color as it will make the color look dull and muted.
For Have Blue Eyes:

  • Make them look icy blue by using darker colors. If you want to make sure your eyes don't look too small, you can brighten up the eye by using a white liner on the water line and by using a soft highlighting color on the inner corner of your eyes.
  • Make the blue more vivid by using orange based colors. Colors ranging from gold to chocolate will make your blue eyes dazzle.
  • Want to bring out the green? Use red based purples and pinks and your eyes will appear to be a new shade entirely.
  • Using silver based colors will enhance the cool tone of the blue. You don't always have to go for complementary colors for the color to compliment your eye.
For Hazel Eyes:
  • What many people consider to be brown eyes are really hazel eyes; light brown eyes with hints of green. This eye color can use any color of eyeshadow and it will look good.
  • Focus on making the green stand out more by using purples and mauves.
Tip of the day: have fun with your friends! This past weekend I had a makeup party with some friends on Saturday and I got to autocross on Sunday (opposite sides of the spectrum, I know) A makeup party with a few good friends can lead you to discover new products, new brands, and a chance to apply makeup to different people. Also, spending the day autocrossing is one of the best ways to spend a day. Especially when you have mexican food and drinks at the end of it. 

Thursday, April 14, 2011

Quick tips on long-lasting makeup

Putting on makup can be fun, but it becomes much less fun when you worry about it smuging and having to reapply it all day long.  The good news is that there is something you can do and, best of all, they're all pretty easy to do. Here's a few tips to help you out!


Want Long Lasting...:

  • ...Foundation?  Then make sure your skin is moisturized before applying any makeup, use a primer before your foundation, and set your foundation in place with some powder.  
  • ...Lipstick?  Use a lipliner pencil; It doesn't have to match the lipstick but be similar to your natural lip shade. After applying lipstick, take a tissue paper and hold it against your lips lightly. Apply some powder and voila! 

Yes, it looks weird.
  • ...Eyeshadow? Find a good quality primer and apply before putting on your eyeshadow. It should stay in place all day long.  Not all eye primers are made the same so be sure to look for one with good durability. 
  • ...Eyeliner? If you don't feel comfortable enough using liquid eyeliner yet, then using gel or pencil eyeliner can work just as well. Want to keep it from smudging all the time? find an eyeshadow of the same shade and lighly press it over the eyeliner. It even works on your waterline!
  • ...Eyebrows? If your eyebrows need enhancing from pencils and powders to look like the exsist, then be sure to use some clear mascara.
Finished result!

Want any more tips that I missed? Have any tips that you find very useful? Let me know!

Long-lasting tip of the day: don't forget to do your "tip of the day" if you're trying to be consistent and, when buying prawn crackers at Super H Mart, make sure they don't require you frying them to eat them. You will be very dissapointed when you open that giant tin can. I was.

Tuesday, April 12, 2011

First Request! Makeup for work - a step by step guide.

If you're like me, you don't want to wake up an hour early to fix your makeup when you could be sleeping. Let's face it, sleeping is pretty awesome. The good news is that you don't have to spend much time each morning on your makeup to look good for work. Even better, with a few simple tricks, you won't have to worry about fixing up your makeup every few hours.

Step 1: Prepping your face for makeup

Before putting any kind of makeup it's important to prep your skin. Three simple steps are washing your face, using a toner to help close pores and clean any remaining impurities, and moisturizer to keep your skin hydrated and looking healthy. Your skin will feel and, most importantly, look differently if you regularly follow these steps every morning before applying makeup and every night before going to bed.

Step 2: Foundation Primer

Why foundation primer? Because it smoothes out your skin and makes your foundation last a lot longer! Just apply some of your favorite primer all over your face.

Step 3: Foundation

Depending on how much coverage you need, you could go for a tinted moisturizer for low coverage or a heavier matte liquid foundation for high coverage. I like to apply my foundation with a stippling brush because it gives the best coverage without leaving streak marks. Don't forget about covering your ear area and also bringing the foundation a bit down to blend with your neck so you don't end up with any abrupt lines.


Step 4: Concealer

Dab a bit of concealer on any areas that may need it. Don't worry about your eye area just yet, we'll worry about that after eye makeup is applies.

Step 5: Eye Primer

In order to avoid having to fix your eye makeup mutliple times a day, dab a bit of eye primer all over your eye lid all the way up to your brow bone.

Step 6: Highlighter

For my eyeshadows I'm going to use colors from the e.l.f. Beautybook - Bright Eye Edition (why, you ask? because it's cheap and gives you a lot of color options).  Use the top left color to apply to your brow bone and the inner corner of your eyes (your tear ducts). This will help define your eyes and make them look brighter and more awake.


here be this color
here be your browbone


Step 7: All over lid color

Taking a big eyeshadow brush, apply the second color choice all over the lid, blending into the highlighter color a bit so there are no obvious edges.


apply all over the lid
use this lovely color


Step 8: Giving your eye more definition

Taking a contour brush, apply a darker shade to the outer corners of your eyes. You don't have to go too dark with your color, just enough to give contrast. Get a big fluffy brush and blend it in a windshield wiper motion going in to the middle of your lid to blend the color. The purpose of this is to avoid any harsh lines as you want a really soft look.
Use this color
apply with a contour brush


blend with a fluffy brush


Step 9:  Lining your eyes

Since we're going for a soft look, I'm going to line my eyes with eyeshadow instead of liquid or gel liners. A pencil eyeliner can also work. Apply to both top and lower lash lines with an angled eyeliner brush. You can also add a white  eyeliner to your waterline to make your eyes look bigger and brighter.
using this color and brush
apply as close to the lashline as possible


Step 10: Finishing your eyes

I like to use a big powder brush to wipe away any stray eyeshadow that may have fallen on my cheeks. Apply concealer under your eyes. This will help clean up any fallen makeup as well. Curl your eyelashes and apply your favorite mascara.

Step 11: Eyebrows

Filling in your eyebrows can help give more structure to your face. You can use a brow pencil, powder or gel. After filling in your brows, be sure to set with a clear mascara or setting gel. This will keep your brows in place and will also keep you from smudging the color away (and only in one eye if you're like me)
With a pencil and brush...
...you too can have eyebrows!


Step 12: Contouring the face with blush, bronzer and highlighter

If you want, you can just add some blush to your cheeks. Apply some on the apple of your cheeks and blend the color back to your ears. To apply bronzer, suck your cheeks in and apply the color to the hollows created, starting by your ear and working the color down towards the middle of the cheek. If you want to create a more define chin line (or get rid of a double chin) you can add bronzer under your jawline to create an illusion of a shadow. To make your cheekbones even more defined, you can add a highlighter above your cheekbones and under your eyes.

apply blush here

bronzer goes here

highlight this area


Step 13: Lips


Line your lips with a soft pink pencil (or peach, depending on your choice of blush). Fill your lips in completely as this will help lipstick last for much longer. Add a bit of lipstick on top but avoid using anything too glossy or shimmery on top. Another good option is to use a lipstain as they last for several hours, but keep lip balm handy as your lips can feel dry without it.

line ALL of the lips
yes on the lipstick


Step 14: The finish!

Apply some powder on your face to set all the makeup in place and you're all set!

You can go from this...
... to this!


Obviously when it comes to makeup you can do as little or as much as you want. You don't have to contoure your face if you're happy with just adding some blush to your cheeks. You don't have to add more definition to your eyes and you don't have to fill in your eyebrows. These are just small steps that don't add too much time to your routine and can add a bit of dimension to your look if you so choose. With practice also comes ease in ability, so the more you do it, the less time it will take you to do each step. You should be able to do all of these steps in about five to ten minutes with a bit of practice.

What to keep in your purse: powder and brush, lipstick, concealer, q-tip to fix any possible smudging and oil blotting sheets if you have oily skin.

Actually useful tip of the day: have breakfast! Even if it's a protein bar on the run, it'll help you feel better throughout the day if you have some food in your stomach. Not very useful tip of the day: watching dogs and cats nap will make you want to sleep. If you want to feel sleepy all day, watch your pets nap all day long.

Monday, April 11, 2011

First pic!

Not too shabby!

The camera from my laptop is kind of terrible but this should give you a bit of an idea of the kind of makeup I did today.  I'll be doing a post tomorrow on how I did this look.

Me being displeased with camera quality
Tell me your thoughts!

Short post on how I chose my blog name

It all started when I decided to start a blog about makeup. So I tried "the makeup project" and that was take. Then I tried "the makeup apprentice" and that was taken as well. Since it was late, and I wanted to go to bed, I decided to go with "the makeup apprentice project" before I allowed myself to get all, erm, creative and something super cheesy like "the makeup philo-sofi" Great play of words on the fact that my name is Sofi. Not! :-p  So there you go, in case you were wondering where the name came from.

Very useful tip of the day: don't make important, lasting choices before going to bed because they will always be the wrong ones.

Because I like giving credit where credit is due...

... I wanted to say exactly what made me rethink everything about makeup lately. All it took was one video tutorial and it was like my eyes opened to the possibility of me being able to do really cool eye make up on my wonky shaped eyes. Ok, so only one of them is wonky shaped, but I always felt like my eyes were the wrong shape to do cool makeup tricks.

So what video was it that changed everything for me? This one. MissChievous has the same eye shape as me. That may not be exciting to many people, but I always felt at a disadvantage when it came to trying smokey looks or anything that required serious crease work. Also, since it was one of her earlier videos, you can really see how much time she spends blending the colors and making sure things look right. It made me feel that pulling that look off was something I could actually do.

Now, I haven't yet done the Arab Peacock look, but I did do the Dior Summer Looks last night and was very proud of my results. Once I have a way of getting pictures onto this computer (my camera doesn't like synching with my laptop for some reason) I'll be adding results of the makeup styles that I do. This week, while my boyfriend is out of town for work, I'm going to go all out and spend a lot of time working on my makeup. And I will be doing the Arab Peacock look. I will also be doing a Sucker Punch inspired makeup look tonight as I'll be going to go see it with one of my friends.

Aside from the lovely MissChievous tutorials, I have been going over xsparkage videos for some great color inspiration and also checking out the adorable TheMakeupChair for her tutorials as well. They both have really useful tutorials for me to learn from. I will, however, not put an eyeliner pencil in my eye, close it, and move it all around for the"easiest possible way of doing tighlining". At least not yet while the thought terrifies me. Last but not least I also really like LetzMakeup and her tutorials, although her eye shape differs from mine so much I have a harder time being able to recreate what she does without having to do some modifications on my part.

Useful tips of the day: take cute pics of your puppies and send them to your boyfriend so he's not so miserable while on his trip. In terms of makeup, watch a ton of videos from a bunch of different artists. They each have their own way of applying makeup (from brush types to technique) and you'll get a good idea of what may be the best way for you to apply makeup on yourself or someone else.

Sunday, April 10, 2011

Makeup can be expensive...

... especially if you're a klutz like me. And drop things. And then they break. And you're also obligated to replace them because they're the eyeshadows you need for your friend's wedding.

I've been wanting to try the Coastal Scents 88 palettes for a while. I knew they were cheap and I had heard they were really good but I'm not a big fan of buying things online. I finally stumbled across a tutorial video where they were using the 120 eyeshadow palettes from BH cosmetics and decided that it may be time to give in and buy makeup online. Not only that, but they had a sale on at the time (they seem to have a different one going on all the time). Around the same time I decided to try out some e.l.f. cosmetics since they have them at my local Target and I was very happy with most of the things I've tried so far. I haven't tried the eyeliner pen yet, but I'm hoping that it can replace the $20 one I got from Lorac that I wasn't too happy with.

Since my original purchase of the 120 palettes I have ordered the blush set, the contour set and the concealer set and I'm just waiting for them to come in the mail (this wednesday!). Even though they are very well priced, it still all adds up to be a nice chunk of money I've spent getting materials in the past month and a half. However, if I want to advance at all, I know I have to invest some money into it. I just wish it didn't have to be mine :-p

Useful tip of the day: Don't be stupid and drop things all the time. Also, it helps to keep most of the makeup on the floor next to you in a container so it's easy to reach while also not taking over your entire work space.

Saturday, April 9, 2011

The Plan

Trying to figure out exactly what to do with your life can be made easier by making a plan. In my case, making a plan usually sends me into an anxiety attack as the prospect of actually figuring out my life terrifies me. Since I'm trying to change that, I've decided to give making plans another shot. This time, I'm going to do more baby steps and worry about the big stuff a bit later on in the future. 

So for now, this is what I'm going to do:

  1. Practice doing makeup once a day, especially focusing on styling eyes.
  2. Actually follow a skin care routine past using a makeup removing towelette every once in a while
  3. Do my friends' makeup as often as possible.
Just to make sure I can stick to my plans, however easy they may seem, I need to figure out issues that may come up and possibly interfere with my plans.

  1. Every so often I participate in autocross, which means that I have to wake up about 4 hours earlier than I care for on a Sunday, I'm generally outdoors with no way to fix any makeup smudges that may occur and I also wear a helmet for about an hour's worth of time throughout the day. Not the most conducive for rocking some makeup but I'm going to take those days to practice very basic makeup looks that aren't very time consuming.
  2. I have very sensitive skin that reacts easily to harsh products. A lot of the time leaving my skin alone seems to be the way to go to keep it mostly under control but I do have the problem of having really dry skin, even during the summer months. As such, I still need to figure out a good skin care routine that works for me and doesn't make me break out all over
  3. My boyfriend lives really far away from everyone else, and since we pretty much live together already (making it official at the end of May), I'm at least a 30-40 min drive from my best friend and roommate. Add at least another 15-20 min if I'm going to be seeing my other close female friends. They also all have ridiculous school/work/school+work schedules so their free time tends to be on the more limited side. How do I deal with this issue? I MAKE THEM SPEND TIME WITH ME EVEN IF THEY DON'T WANT TO! HA! In all seriousness, I probably won't be able to do their makeup very often but I'm hoping to be able to do it at least once a week so I can practice doing makeup on someone else. Especially doing eyeliner, cause that s**t is HARD.
Now that I have a plan set up, it's time to set it into motion. I already did my makeup today and discovered that spring makes my eyes water so even primers don't prevent all smudging. Tip on how to fix that: keep your eyes open really wide so no one gets a chance to look at your smudged eyeshadow and liner.

The awesomely exciting beginnings of it all.

Today I decided, after much thought and consideration, to give it a go as a makeup artist! Will it work out for me? Maybe, but this time I'm not going to let the possibility of failure stop me from trying it out. Not this time. In case you can't tell yet, I'm pretty good at psyching myself out. I'm trying not to do that to myself anymore as I've come to realize that not doing something due to fear of failure is even worse that failure. Because you at least tried to have been able to fail. 

My love of makeup started many years ago when I was about ten years old. I would try to get those makeup kits for little girls but my mom would never want to buy them for me. When I finally got one, my mom would never let me wear the makeup outside the house. When I was thirteen all I know was to put some blue eyeshadow on my lids because I thought it would accent my blue eyes. I knew nothing else of makeup but I thought I was awesome for being able to wear my rocking icy blue eyeshadow.

By the time I got to high school, I discovered that doing a black line in my waterline would accent the blue in my eyes and make my eyelashes look fuller. My learning process for a long time was very slow but I still loved makeup and I loved getting makeup as birthday and christmas presents. I wanted to learn more but, for some reason, I never thought to play with it as if it were a hobby.

When I moved to the United States, I was asked to help out with the makeup for a theater production of "The Lion In Winter". I got to learn how to do aging makeup and also how to make fake pimples. Learning how to do stage makeup was a blast for me and, had it not been for the help of the wonderful lead who would come in early so I could practice makeup on him, I would not have been able to get my slow start in my pursuit of a career in makeup.

Why do I say slow? Because that was over four years ago...

What changed recently? I offered to do a friend's makeup for her wedding. Why? I don't know. I knew I was ok at doing some makeup but it never dawned on me until later how big a task I was taking on. So what did I do? Go to youtube, of course. And start watching a ton of makeup tutorials. And practicing my technique. In such a short amount of time I'm doing things I wouldn't have thought possible on my eyes due to being convinced for the longest time that my hooded eyes meant no fun eyeshadow stylings. I'm so excited about doing makeup that I'm even trying to figure out ways to get my boyfriend to let me do makeup on his face. If he does ever let me, I probably won't post pictures of it. Probably. :-p

So what's in store for me in the near future? Convince a bunch of my friends to let me do their makeup and take pictures so I can start building my portfolio. Maybe even do some makeup tutorial videos if I'm feeling daring.

I can't freaking wait!